This month marks our one year anniversary of Los Dos Aiko’s! What started out as a New Year’s resolution in 2012 to be a little more creative with Audrey everyday, quickly lead to new self-discoveries, joys, challenges, and the creation of this blog. It’s been real.
3 things I never thought would happen once I started a blog:
1) I never thought I would connect with so many people all around the world in one short year. Thank you blogging community!! Your feedback, encouragement and camaraderie has been staggering. I hope I can give back to you as you have done to me.
2) I never thought I would be so sleep deprived and happy/content at the same time. I’ve spent many a night while the household is asleep, trying to edit just the right photo, re-shoot something, fix a seam, or re-bake a recipe that went completely wrong. But that’s what makes me tick. I think when you are truly enjoying the moment, time becomes obsolete.
3) I never thought it would be so fulfilling – creatively and emotionally. Having Audrey be such an integral part of the journey has been a special experience. It’s challenged me to put more “creative juice” into our day to day and set goals. Plus, now we have a visual diary for our memories.
So since this is an anniversary post, I thought some kind of “Year-In-Review” was in order. Here are a few of our favorites from the past 12 months:
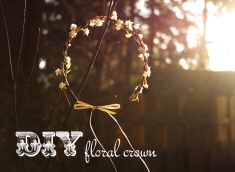
In January we started the blog with so many ideas. The first post was simply about the DIY Floral Crowns I made as Christmas gifts. For many years, my family has long suffered through my “Crafty Christmas” gifts, so a post of this nature was definitely a must.
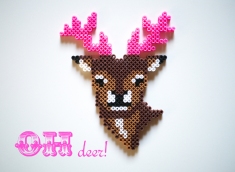
In February we celebrated Bryce’s birthday in Bend. We made our first Valentine’s bunting. We discovered Perler beads again, and learned it’s much easier to make a mess than to get them on the peg board. Nonetheless, Oh Deer! was created.
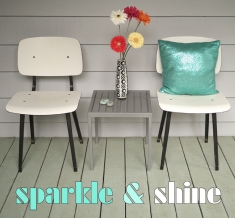
We also discovered that the best way to re-style an old sequin top is to sew it into a Sparkle ‘n Shine pillow cover!
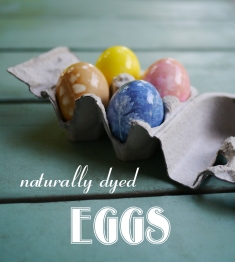
In March we tried out all kinds of quinoa and vegan recipes. We prepared for Easter and got in touch with our earthy side with Naturally Dyed Eggs. Audrey went on her first Easter Egg hunt and loved it so much she went on two more.
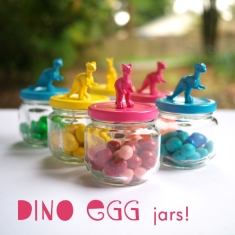
In April we went on many day hikes and to the zoo a bunch. Audrey started her first swim classes. We party prepped and got crafty with these Dino Egg Jars.
In May we celebrated my birthday at the beach in the sun. We made DIY Paper Poppies for our Moms on Mother’s Day.

Then we rounded out the month by celebrating our sweet baby girl’s second birthday at the park. She ran around the house the days prior yelling Audrey is “Two Old!”

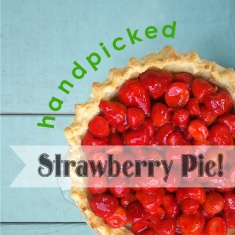
In June we drove around the state going to many of Bryce’s trail running races. Then we couldn’t wait to get out to the farms and pick berries. We hit up Sauvie Island for a day of strawberry picking and came home and made this Handpicked Strawberry Pie.
In July the weather was really heating up. We went on a ton of hikes and went back to the beach for a vacation. We went to Crater Lake and many outdoor BBQs. I made Fruit Cube Mocktails.

In August we attended our cousin’s beautiful wedding in Seattle. We also finished up Bryce’s last race of the season and wrapped up all the adventures of the summer in one simple post Lately…

In September we took advantage of the last month of summer to go to the fair. What resulted was County Fair Style. We made peach handpies for the first time and picked flowers at the dahlia farm.

In October we took Audrey to the pumpkin patch and learned how to carve pumpkins with a drill (oh yah!). Audrey got excited for trick-or-treating. We made a Felt Flower Necklace and I realized that felt might be my favorite medium.

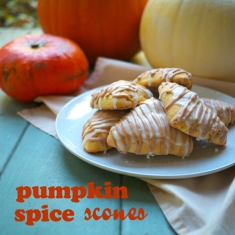
Also in October we finally perfected a Pumpkin Spice Scones recipe. It definitely rivals Starbucks.
In November we marveled at the fall colors and tried all kinds of new baking recipes. We were just plain thankful, thankful and more thankful. So we wrote about Thankfulness.

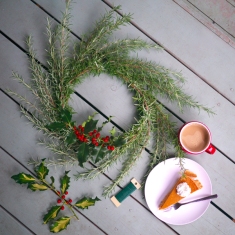
In December we attended our other lovely cousin’s wedding in Los Angeles. We love weddings! Audrey went to the Long Beach aquarium for the first time and we went to zoo lights…(twice). It was time to decorate for the holidays and we made this DIY Rosemary Wreath for our front door. Then it was crafting madness making Christmas gifts for our family…and the rest is history.
Whew! That was lengthy! We hope you are having a great new year so far. We can’t wait for all that is in store for 2014. Lots of BIG changes for this little family.
Here’s to new beginnings!!
Love,
Aiko & Aiko
Tags: beads, beverage, Christmas, cooking, crafts, DIY, family, farm, fashion, flower, handmade, handmade gifts, holiday, home decor, lately, occasions, party decor, recipes, style, tutorials
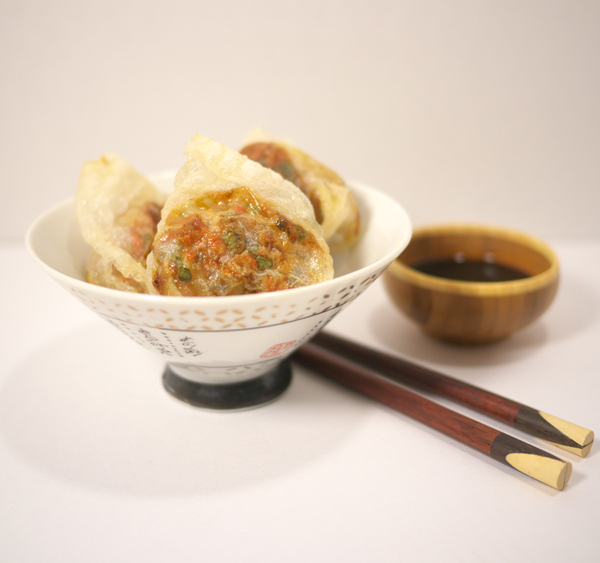
 What’s better than homemade strawberry rhubarb pie? The miniature version of course! May is here, and it always seems to put strawberries on my mind. I really can’t think of another food that I enjoy eating more than pie. It should be it’s own food group in my opinion. There are just so many ways you can stuff it – fresh, baked, savory, sweet, (even meat!), the hand-pie version, the traditional version, or the mini version. I’ll take it any which way. But nothing is quite like the timeless combination of sweet strawberry and tart rhubarb.


 I got the recipe for the crust from my dear friend, JoNelle. She makes the best pies and is such a good friend of our family’s, I forget that we’re not related sometimes!
 There you have it! Another way to serve a favorite dish. Enjoy! …and try not to eat them all in one sitting.