Mini Strawberry Rhubarb Pies

3 May

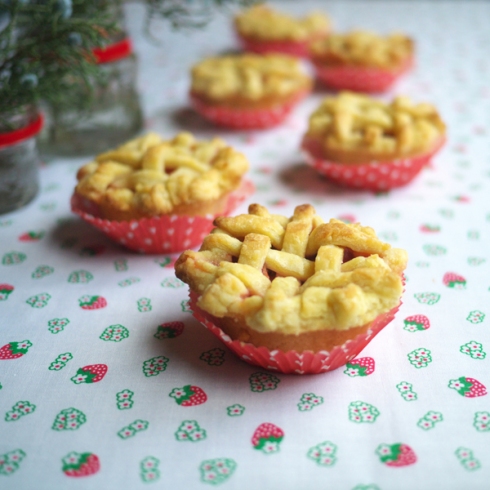
Mini SR Pie HeaderWhat’s better than homemade strawberry rhubarb pie? The miniature version of course! May is here, and it always seems to put strawberries on my mind. I really can’t think of another food that I enjoy eating more than pie. It should be it’s own food group in my opinion. There are just so many ways you can stuff it – fresh, baked, savory, sweet, (even meat!), the hand-pie version, the traditional version, or the mini version. I’ll take it any which way. But nothing is quite like the timeless combination of sweet strawberry and tart rhubarb.

Mini SR Pie 01

Mini SR Pie 02

Mini SR Pie 03

Mini SR Pie 04I got the recipe for the crust from my dear friend, JoNelle. She makes the best pies and is such a good friend of our family’s, I forget that we’re not related sometimes!

Mini Strawberry Rhubarb Pies

Crust (from my friend JoNelle, adapted from relishmag.com)

3 cups flour

1 teaspoon salt

1 tablespoon sugar

1-1/4 cups shortening

1 egg

3/4 teaspoon vinegar

1-2 tablespoons cold water

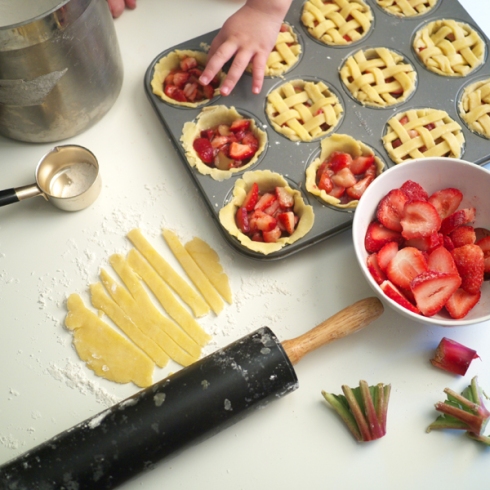
Mix flour, salt and sugar. Cut in shortening. Stir in egg and vinegar. Sprinkle in water, 1 tablespoon at a time, mixing until all flour is moistened and pastry almost cleans side of bowl. Gather pastry together and divide dough into 1/3 and 2/3 size balls. Set aside 1/3 size ball. Grease muffin tin. Gather 2/3 size ball and divide into 12 smaller rounds for the base crusts. Shape and flattened each round on a lightly floured surface and press into each greased muffin tin.

Strawberry Rhubarb Filling

Mix together:

2 cups rhubarb diced

2 cups strawberries diced

1/2 cup sugar (may add more depending on desired tartness)

Directions

Preheat oven to 425°F. Scoop strawberry rhubarb filling into each mini pie crust. Take 1/3 dough ball that was set aside, and divide in 12 smaller rounds. (I topped my pies with a lattice pattern, but you can cover them however you like.) Shape and flattened each round on a lightly floured surface and cut into 6 thin strips. Weave each strip into a lattice on top of each pie. Bake for 12-15 minutes, or until crust is golden brown. Let cool before removing from tin. Optional: serve in cupcake papers. Makes 12 mini pies.

Mini SR Pie 05

Mini SR Pie 06There you have it! Another way to serve a favorite dish. Enjoy! …and try not to eat them all in one sitting.

Love,

Aiko & Aiko

The last days of “two”

29 Apr

Outfit 01a

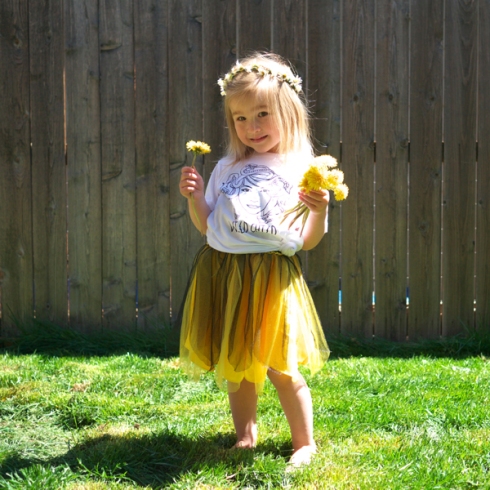
Can’t believe this little bee is going to be turning three in just a few short weeks. Over the last few days, I’ve caught myself trying to soak up her “two-ness”. Jotting down her funny fragmented sentences, the way she buckles over in laughter at her own jokes, how she scrunches up her nose and widens her eyes when she’s telling me a story, and the feeling of her tiny hand in mine when we go for walks. I often wonder why I don’t remember to breathe in every moment like this. I’m learning. She’s teaching me.

I thought it would be a good idea to document her just as she is lately. Then a pretty package of new summer clothes from Wild Child Apparel arrived on our doorstep. They have the cutest things! I thought, what a perfect opportunity to let this two-year old play “fashion model”, while mom enjoys what she loves playing – “stylist”.

Oh, and I should mention I’m planning on trimming that wild corn silk hair for the first time here very soon. (insert tears here) It’s halfway down her back! So here it is, in all it’s natural wild child glory. *pun intended

Outfit 01b

Outfit 01c

Shirt – Wild Child Apparel

Tutu – TJ Maxx

Flower Crown – me

 Outfit 02a

Outfit 02b

Outfit 02c

Outfit 02d

Dress: Wild Child Apparel

Jean Jacket: Levi’s

Hat: H&M

Shoes: Converse

Shwings: Wild Child Apparel

Lastly, I must add Shwings are some of the cutest inventions I’ve seen in a long time…and they are just fun to say.

Love,

Aiko & Aiko

Life Lately…

24 Feb

Lately headerHowdy friends! As I sit down to write this, the best word that comes to mind to describe our life lately is “brand new”. We’ve officially moved to Central Oregon, yippee ti yi yay!! It’s dryer, sunnier and snowier on this side of the Cascades than our former Portland habitat, but we are adjusting just fine. After six weeks of packing and preparing to move, we ultimately moved during a snowstorm (great coincidence, eh?). All I can say is it’s been an adventure. Here’s a photo diary of our latest moments and fond memories from the past weeks…

Audrey FairyMemories from P-town: Audrey is full of whimsy and imagination these days. Often, she puts on these fairy wings and flutters about like “Angelina Ballerina”.

Mother-Daughter VansI bought Audrey and I our first matching mother-daughter Vans, so we could pop ollies at the skatepark…duh. No, actually they were just cute.

PortlandWe said a bittersweet farewell to our life in Portland. The city Bryce has known for 27 years of his life, and me for the last decade. It’s been a great incubator for so many firsts in our life: graduating from college, our first careers, getting married, our first “new” cars, our first home, our first dogs, and our first baby. Also, Bryce’s parents, aunt, uncle and grandparents live there, so it was heartbreaking to leave. Fortunately it is only a short weekend trip away, so we will be back plenty in the future.

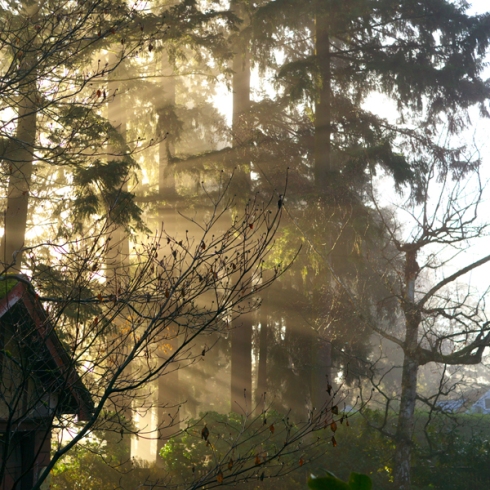
Sunrise forestSaying goodbye to the morning view out my old dining room window. I will never forget how the sun breaks through the trees just like this.

Bryce PortlandBryce, Kenobi and Hobbes enjoying a last “coffee stroll” along the Willamette waterfront. It will be awhile until we can do that again.

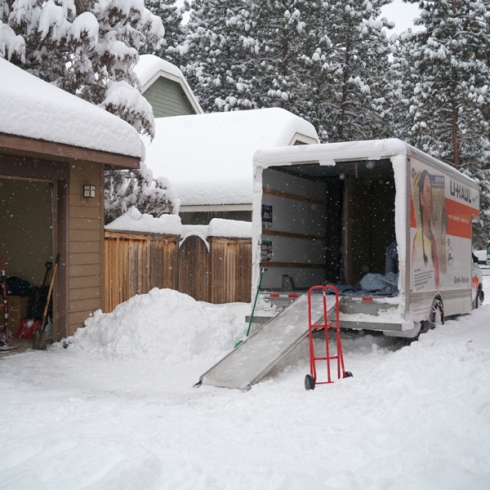
Moving 1Moving Day #1: Down the road in our U-Haul caravan we go! A drive that would normally take 3 hours, took us 7 hours through white-outs and heavy winds.

Moving 2Moving Day #2: Time to unload in 2 feet of snow! I have to say, I had never done that before. Can I check it off my bucket list now?

Happy snow girlOur first walk through our new neighborhood.

Snowy walkAudrey is right at home in the snow.

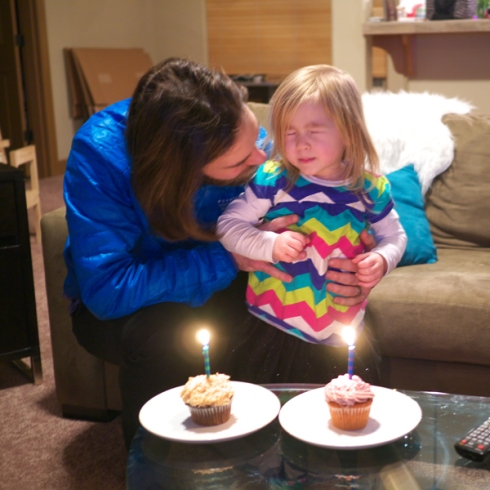
Bryce birthdayCelebrating Bryce’s birthday with cupcakes! Little A helping Daddy make a wish.

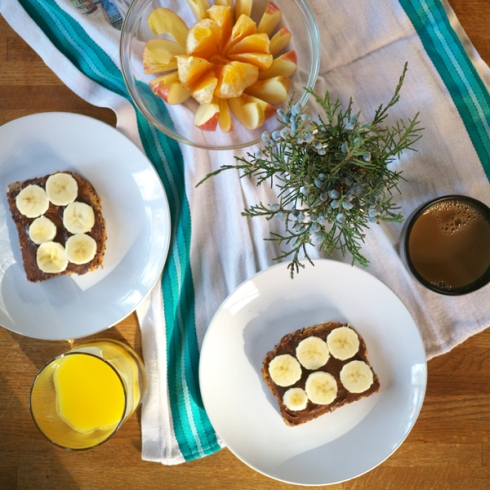
Nutella breakfastEnjoying some slow mornings with coffee, Nutella, toast, and fruit.

Pilot Butte 3Our first trip to Pilot Butte!

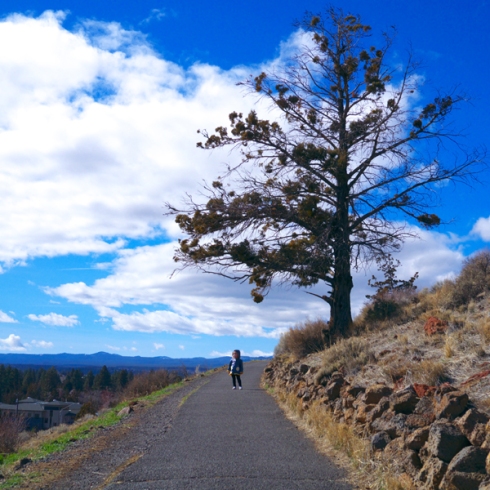
ExploringExploring the nature in our new backyard. The Deschutes River is four minutes from our doorstep!

Enjoying the viewWorking hard, playing hard, and remembering to breathe and take it all in.

Love,

Aiko & Aiko

Clean Eating // Homemade Gluten Free Granola!

31 Jan

Gluten Free Granola Header

Who am I kidding? I’m definitely not the poster child for clean eating. I enjoy my pop tarts, oreos, and mac ‘n cheese like the rest of us normal people, but every now and then I press reset and try to start a new trend. The idea to make homemade granola sprang from my need to clean out my bulk food cupboard. Seeing as we are moving in the next week (more on that at the end of this post), it seemed like the smart thing to do. All of the ingredients for this granola are ridiculously healthy (I mean…Ridiculous!), and when mixed together, provide the perfect pow to your day. I know this because I’ve been eating it for weeks now. Take that as fair warning that it makes A LOT.

GF Granola 03

Homemade Gluten Free Granola

Ingredients:

1/2 cup pecan halves

1/2 cup sliced almonds

1/2 cup sunflower seeds

1/2 cup pumpkin seeds

1/2 cup dried cranberries

1 cup coconut

1/2 cup ground flax seeds

1/2 cup chia seeds

2 cups gluten free oats

1 Tablespoon cinnamon

1 Tablespoon vanilla extract

3/4 cup agave nectar

1/2 cup applesauce

2 Tablespoons canola oil

Directions:

Preheat oven to 350 degrees F. Combine all of the ingredients in a medium size bowl and mix. Line a cookie sheet with parchment paper and spread all of the ingredients out into a thin layer. Bake for 10 minutes. Turn ingredients. Bake another 10 minutes. Turn ingredients. Bake another 5 minutes. Total baking time is about 25 minutes or so. Flakes should be a toasted golden brown. Cool and store in an air-tight container.

GF Granola 01

These little hands make for a great stirring partner. She practically begs to do all the dumping and stirring. My work here is done.

GF Granola 02

All spread out and ready to get toasted! Clean food photographs quite nicely, eh?

…Now on to the BIG NEWS! We are moving to Bend, OR! It’s been a dream of ours for many years and we’re finally taking the leap. My husband got offered a fantastic job with other like-minded people, and I am able to continue my architecture career working part-time from home. Folks, I can’t believe how evident it is that this is God’s plan for our family. We were so nervous about going out on a limb, relocating our family, and giving up the lives we have built in Portland, but we’ve never felt more excited and invigorated in our marriage about embarking on this new adventure together. If there is one thing I’ve realized, it’s that change is constant and almost always uncomfortable, but sometimes necessary in order to allow God’s guidance in our life.

Love,

Aiko & Aiko

Los Dos Aiko’s 1st Anniversary; Year in Review

4 Jan

2014 Year in Review

This month marks our one year anniversary of Los Dos Aiko’s! What started out as a New Year’s resolution in 2012 to be a little more creative with Audrey everyday, quickly lead to new self-discoveries, joys, challenges, and the creation of this blog. It’s been real.

3 things I never thought would happen once I started a blog:

1) I never thought I would connect with so many people all around the world in one short year. Thank you blogging community!! Your feedback, encouragement and camaraderie has been staggering. I hope I can give back to you as you have done to me.

2) I never thought I would be so sleep deprived and happy/content at the same time. I’ve spent many a night while the household is asleep, trying to edit just the right photo, re-shoot something, fix a seam, or re-bake a recipe that went completely wrong. But that’s what makes me tick. I think when you are truly enjoying the moment, time becomes obsolete.

3) I never thought it would be so fulfilling – creatively and emotionally. Having Audrey be such an integral part of the journey has been a special experience. It’s challenged me to put more “creative juice” into our day to day and set goals. Plus, now we have a visual diary for our memories.

So since this is an anniversary post, I thought some kind of “Year-In-Review” was in order. Here are a few of our favorites from the past 12 months:

In January we started the blog with so many ideas. The first post was simply about the DIY Floral Crowns I made as Christmas gifts. For many years, my family has long suffered through my “Crafty Christmas” gifts, so a post of this nature was definitely a must.
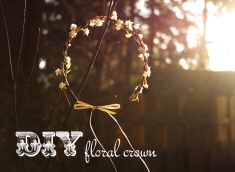
DIY Floral Crown

In February we celebrated Bryce’s birthday in Bend. We made our first Valentine’s bunting. We discovered Perler beads again, and learned it’s much easier to make a mess than to get them on the peg board. Nonetheless, Oh Deer! was created.

Oh deer!

We also discovered that the best way to re-style an old sequin top is to sew it into a Sparkle ‘n Shine pillow cover!

Sparkle & Shine Header

In March we tried out all kinds of quinoa and vegan recipes. We prepared for Easter and got in touch with our earthy side with Naturally Dyed Eggs. Audrey went on her first Easter Egg hunt and loved it so much she went on two more.
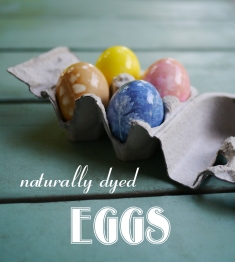
Naturally Dyed Eggs Header

In April we went on many day hikes and to the zoo a bunch. Audrey started her first swim classes. We party prepped and got crafty with these Dino Egg Jars.
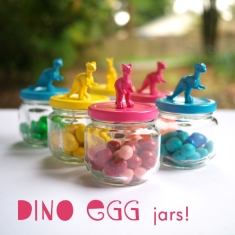
Dino Egg Jars

In May we celebrated my birthday at the beach in the sun. We made DIY Paper Poppies for our Moms on Mother’s Day.

Paper Poppies Header

Then we rounded out the month by celebrating our sweet baby girl’s second birthday at the park. She ran around the house the days prior yelling Audrey is “Two Old!”

Bubbles

In June we drove around the state going to many of Bryce’s trail running races. Then we couldn’t wait to get out to the farms and pick berries. We hit up Sauvie Island for a day of strawberry picking and came home and made this Handpicked Strawberry Pie.
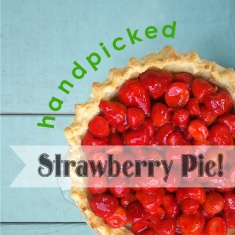
Handpicked Strawberry Pie Header

In July the weather was really heating up. We went on a ton of hikes and went back to the beach for a vacation. We went to Crater Lake and many outdoor BBQs. I made Fruit Cube Mocktails.

Fruit Cube Mocktails Header

In August we attended our cousin’s beautiful wedding in Seattle. We also finished up Bryce’s last race of the season and wrapped up all the adventures of the summer in one simple post Lately…

Dahlia Picking

In September we took advantage of the last month of summer to go to the fair. What resulted was County Fair Style. We made peach handpies for the first time and picked flowers at the dahlia farm.

County Fair Style Header

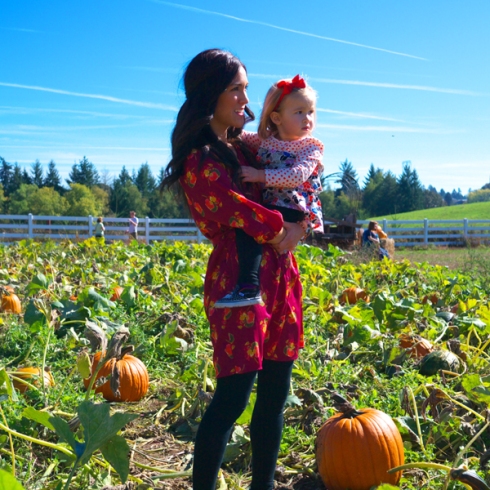
In October we took Audrey to the pumpkin patch and learned how to carve pumpkins with a drill (oh yah!). Audrey got excited for trick-or-treating. We made a Felt Flower Necklace and I realized that felt might be my favorite medium.

Felt Flower 4

Also in October we finally perfected a Pumpkin Spice Scones recipe. It definitely rivals Starbucks.

Pumpkin Scone Recipe Header

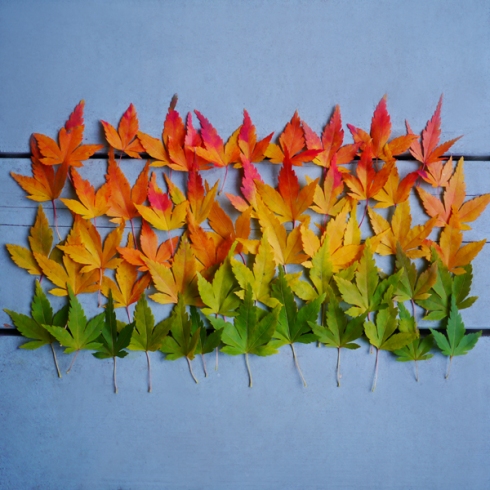
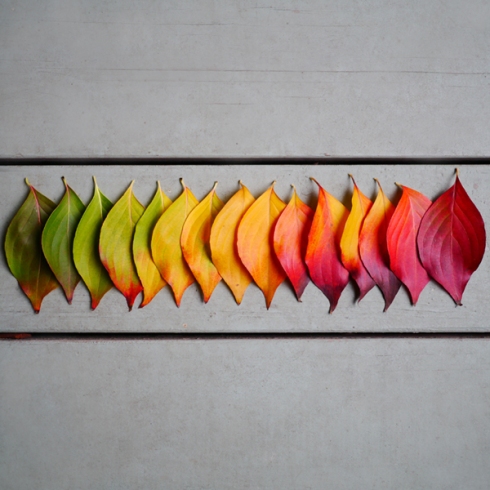
In November we marveled at the fall colors and tried all kinds of new baking recipes. We were just plain thankful, thankful and more thankful. So we wrote about Thankfulness.

Leaf Project

In December we attended our other lovely cousin’s wedding in Los Angeles. We love weddings! Audrey went to the Long Beach aquarium for the first time and we went to zoo lights…(twice). It was time to decorate for the holidays and we made this DIY Rosemary Wreath for our front door. Then it was crafting madness making Christmas gifts for our family…and the rest is history.
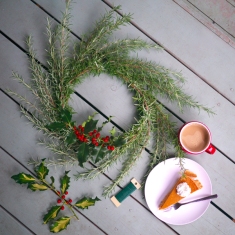
Rosemary Wreath

Whew! That was lengthy! We hope you are having a great new year so far. We can’t wait for all that is in store for 2014. Lots of BIG changes for this little family.

Here’s to new beginnings!!

Love,

Aiko & Aiko

DIY Rosemary Wreath

2 Dec

Rosemary Wreath Header

Ok, here’s the deal: I have way too much rosemary on my hands. I have a tree (ahem, plant) that is 5 feet tall, and I don’t know what to do with it all. Sure it’s fabulous for cooking and it smells glorious, but most days I’m not sure how best to make use of it…and there’s LOTS of it. Here’s the second part: I already told myself I wouldn’t spend money on decorations this year. It just seems like we have SO much already. So over the weekend, I pulled out my faithful red berry Martha Stewart wreath to hang on the front door, but somehow it felt lack-luster (no offense, Martha). Cue Giant Rosemary Plant to the rescue!! The poor guy sits on the side of my house all year long waiting for his season of glory. I went out and trimmed several limbs from his trunk and went to work.

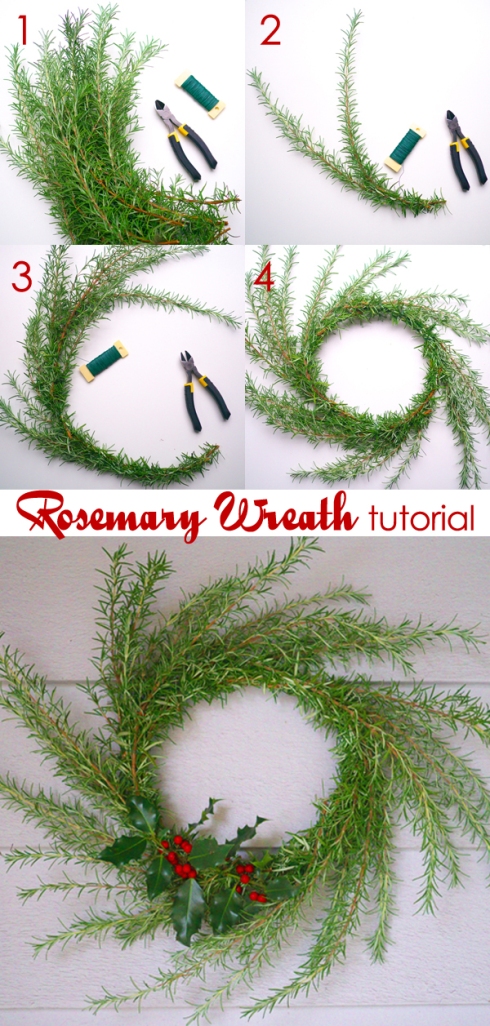
I used little more than a pair of wire cutters and some green florist wire for assembly. You could use a wreath ring or a sturdy wire such as a coat hanger for a frame, but I found that my wreath formed into a circle without them. It only took about an hour from pruning to hanging on the wall. The best part is it smells ah-mazing! I wish you had a scratch ‘n sniff computer screen (but I’m sure you can imagine). My fingers will smell of minty forest spice for days, but I don’t mind. Here’s what I did:

Rosemary Wreath Tutorial

Directions:

1. What you will need: A bundle of rosemary sprigs, some green florist wire & wire cutters.

2. Start with 2 sprigs and wire together about a 2″ segment. I chose to keep the sprigs longer and “wild” looking.

3. Continue adding sprigs by wiring one on the last one, always connecting to the last sprig in the wreath. Gradually bend the rosemary into a round.The rosemary I used already had a natural curve to it, so this part was easy.

4. Complete the circle until it connects back to itself. You can continue adding sprigs until the desired fullness is attained. The finishing touch: add a holly sprig or bow etc. for color.

Rosemary Wreath

There you have it, a leafy designer-looking wreath for free! Now sit back and enjoy it with a slice of holiday pie and a gingerbread latte.

Side note – I chose to add holly to my wreath because we also have a GIGANTE holly tree in our backyard. I have yet to come up with some clever uses for him too, but I’ll leave that for another post (wink wink).

Happy decking the halls!

Love,

Aiko & Aiko

Thankfulness

25 Nov

Japanese Maple

Hi ya’ll!!! I know it’s been awhile since I’ve posted…and wow, how time flies! Honestly, I’ve been struggling with what to share for a Thanksgiving post (what scrumptious menu options to try?, what DIY table decor to feature?) when suddenly it bonked me right in the noggin: keep it simple Jaclyn, keep it true, keep the message about what it’s always been about: gratitude. Real obvious, right? …and so fitting for where we are in our lives. Our little family has had it’s share of “life events” over the last 2 months that have really brought the real and true things into perspective. Funny how that happens, eh? All in all, we keep leaning on our faith, our support system, and an attitude of thankfulness.

Bryce and I started a little tradition early in our marriage to identify one thing a day that brought us joy. Sometimes it was the stellar latte I got from my favorite coffee truck barista, sometimes it was pulling up to a gas station and realizing I’d earned enough points to get 10 cents/gal off my gas, booyah!  It wasn’t long before we recognized some re-occurring themes. So I thought I’d share a few with you all and send a message to take note of your simple joys in the day to day. Because if you’re not looking, they might just smack you in the noggin.

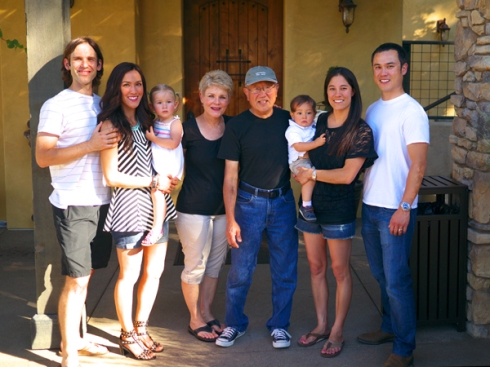
I’m thankful for our Sweet Fam

Sweet Fam

Yoshida Fam

Benge Fam

I’m thankful for opportunities to Relax

Relax

I’m thankful for Comfort Food

Brunch for Dinner

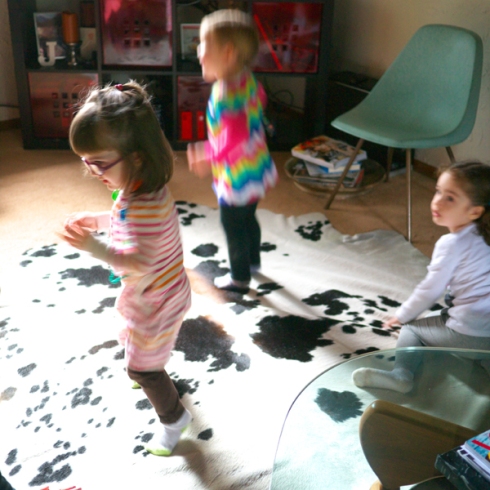
I’m thankful for Uncontrollable Joy

Jump

I’m thankful for Beauty

Sunflower field

Leaf Project

I’m thankful for Spontaneous Laughter

Spontaneous Laughter

I’m thankful for our Faith

Faith

I’m thankful for Being a Mom

Mellow Mushroom

Pumpkin Patch 2

Have a very wonderful Thanksgiving friends!

Love,

Aiko & Aiko

“Do not be anxious about anything, but in everything, by prayer and petition, with thanksgiving, present your requests to God.”

Philippians 4:6

Pumpkin Spice Scones

21 Oct

Pumpkin Scone Recipe Header

When fall is in the air, there’s no denying my craving for pumpkin-flavored everything. Actually, who am I kidding? I have a craving for pumpkin deliciousness all year round. It’s hard for me to pass by the beautiful orange and white varieties at the grocery store, or walk into a Starbucks without leaving with a pumpkin spice latte or a scone in hand. The best part about Starbucks is they have those perfect pumpkin scones available all year round. Well maybe that’s not the best, because I crave them all year round. So this season I vowed to wise up a bit, and bake them at home. (I figured if I’m going to eat them, I might as well know what’s in them and hopefully save a pretty penny too, right?) I searched high and low for a good recipe to try, and this one from We Heart Food promised to be near identical to the real thing. So I gave it a whirl…

Icing 1

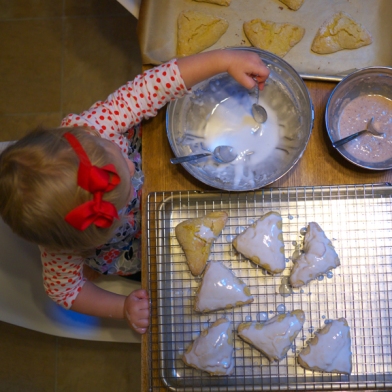
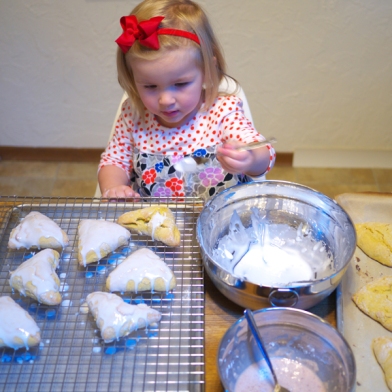
…and it did not disappoint. Booya!! We had little homemade pumpkin scones in no time. Of course I can’t take all the credit, my little helper in the kitchen did all the dumping and stirring. She’s even getting pretty good at measuring! Once these scones came out of the oven, Audrey was begging to ice them. We made a simple powdered sugar glaze to start. We iced each scone twice, to ensure each was completely covered. It just seemed like the right thing to do.

Icing 2

Then we mixed up the spiced glaze and drizzled it over the scones in a zig zag. We added twice the amount of spices to the glaze. I wrote the actual amounts we used in the recipe below. It just tasted better with more spice. Then we sat back and tried not to devour them all in one sitting!

Devour

Pumpkin Spice Scones (adapted from We Heart Food and modified a bit )

Scones:
2 1/2 cups all-purpose flour
1/4 cup and 3 tablespoons granulated sugar
1 Tablespoon baking powder
1/2 teaspoon salt
1/2 teaspoon ground cinnamon
1/2 teaspoon ground nutmeg
1/4 teaspoon ground cloves
1/4 teaspoon ground ginger
6 tablespoons cold butter, cut into 1/2 inch cubes
1/2 cup canned pumpkin puree
3 tablespoons half-and-half
2 large eggs

Powdered Sugar Glaze:
1 cup plus 1 tablespoon powdered sugar
2 Tablespoons milk

Spiced Glaze:
1 cup powdered sugar
2 tablespoons milk
1/2 teaspoon ground cinnamon
1/4 teaspoon ground nutmeg
1/8 teaspoon ground ginger
1/8 teaspoon ground cloves

Directions:

Preheat the oven to 425 degrees F. Line a baking sheet with parchment paper; set aside.
In a bowl, stir together the flour, sugar, baking powder, salt, cinnamon, nutmeg, cloves and ginger. Add the butter and break up with a fork to coat with flour mixture. Mix until the butter pieces are no larger than small peas.
In a separate bowl, whisk together the pumpkin, half-and-half and egg. Fold wet ingredients into dry ingredients, and form the dough into a ball. Pat out dough onto a lightly floured surface and form into a 1-inch thick rectangle about 4 inches by 12 inches. Use a large knife to slice the dough making three equal portions. Cut each of the portions in an X pattern (four pieces) so you end up with 12 triangular slices of dough. Place on prepared baking sheet. Bake for 14-16 minutes, or until light brown. Place on wire rack to cool.
While the scones are cooling, make the powdered sugar glaze by mixing the powdered sugar and milk together until smooth. When scones are cool, spread plain glaze over the top of each scone twice. Allow to firm.
While the powdered sugar glaze is firming, combine all of the ingredients for the spiced glaze. Drizzle over each scone and allow the icing to dry before serving.

12 scones

Pumpkin Scones

We hope you enjoy! We’ll be making these again for sure.

Love,

Aiko & Aiko

Felt Flower Necklace

1 Oct

Felt Flower Necklace HeaderI’ve recently fallen in love with felt. I don’t know why it’s taken me so long to come around, but I’ve got a crush and it’s sticking.

Felt is a breeze to work with, it doesn’t fray, and it’s simple to manipulate with a little needle and thread or even glue! PLUS unexpected bonus: it surprisingly adds a punch of style to your wardrobe when mixed with other textiles.

Felt Flower 4

I bought this dress back in June. I wore it once, but I always thought it needed a color pop. Enter the need for a bright necklace: I searched every store in the mall to find something colorful, fun and fabric-like. Nothing even came close to what I envisioned. Was I asking too much?? I hope not. Either I was way out of style or just really out of season (oh no!).

SO…I was forced to resort to my do-it-yourself tendencies and…Enter DIY felt flower necklace idea. A simple trip to the fabric store, a movie in my blueray player, Ginghers in hand, and I was cranking out flowers like it was nobody’s business. Of course Audrey had a say in what colors we purchased. Her selections were pink, pale pink and dark pink. ~sigh~ This Mama likes these too, so I didn’t object.

Here’s what I did:

Necklace Tutorial

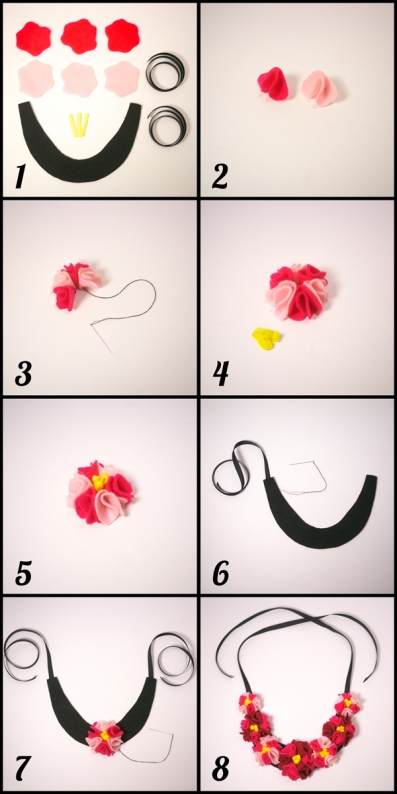
1. Start with six petals about 1 1/4″ diameter, a 1/2″ x 1″ yellow felt “pistil”, a black yoke and 2 ribbons (16″ long).

2. Fold petals into quarters, then stitch together at the corner.

3. Sew the petals together along their corners.

4. Once all six petals are attached together, take the yellow felt and make slits in one side. Fold over the ends and glue in place, creating a pistil.

5. Glue the pistil into the center of the flower.

6. Sew a ribbon to each end of the yoke.

7. Sew the flowers on the yoke. You can use as many as you like. I used seven flowers in three different sizes.

8. Voila! You’re an Accessories Designer!

Felt Flower 3

I’m just glad this beauty goes well with my fall/winter wardrobe too, so I can appreciate it throughout the year.

Love,

Aiko & Aiko

Linked up with All Things With Purpose!

County Fair Style

6 Sep

County Fair Style Header

Ferris Wheels & Funnel Cake… Carousels & Cotton Candy… Farm Animals & 4-H Tents… Oldies Cover Bands & Old Fashioned Arcades… Add all of these things up and what do you get? The County Fair!! (What else?)

As summer comes to a close, I thought it would be fun to share some pics from our County Fair trip.  The Fair has always held special memories for me. For some people it conjures up thoughts of sno cones and giant teddy bears, but for me the Fair meant “judgement day”. Yep, I was a 4-H girl from Elementary School to High School. Not the livestock-raising kind, but the sewing, cooking, painting, and all around home-ec kind. The Fair was the epitome of everything we had learned over the past year. It was presented in the form of (for example) one meticulously-sewn sun dress, one labored-over golden loaf of bread (that was baked 3 times to get it right), or one nerve racking panel-judged Cooking Contest.

I was always nervous for judging day. The judges examined everything with inquisitive detail and asked so many questions! But like any other (reasonably) nervous experience, it built character. Best case scenario, you could get selected to show at the State Fair…oooh, aaah! Which meant more opportunities to win ribbons and receive award checks in the mail. They were small, but all the motivation this girl needed to build up her skills year round.

Ride 2

Ride 1I was surprised how these fond memories came to light when we brought Audrey to the Fair for the first time. Of course we went straight to the animal barn. She enjoyed petting the sheep and goats, while Bryce enjoyed digging in the giant corn kernel box. We took her to see the 4-H tent, and I explained to her my history and all the “when Mommy was little” stories. Yada, yada, yada… I’m not sure she understood, but that’s ok. If she shows any interest later in life, I’ll be sure to provide a re-cap.

4-H

Sheep

Piggies

View 2

View 1

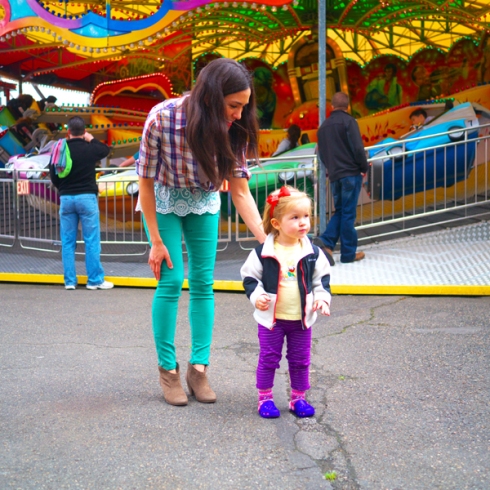
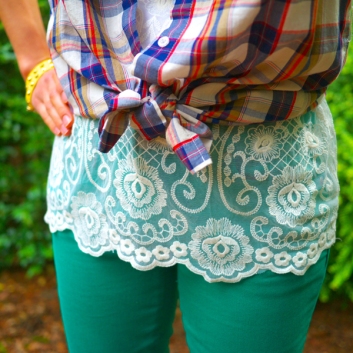
Outfit Deets

The super-duper economical Outfit Details!!

Plaid Shirt: Thrifted

Lace Tank: Forever 21

Pants: Marshalls

Suede Booties: Target

Kisses

By the way, 4-H stands for HEAD, HEART, HANDS & HEALTH!

Love,

xoxo Aiko & Aiko

Linked up with Blair for “life lately!”